Bought a new portable pole, and prefer to install it yourself?
Portable poles are actually designed to be installed by the layperson. No engineering degree required! However, it is important to make sure that you follow the manufacturer's instructions closely to ensure safe and effective installation.
Here's some tips from our resident pole guru:
1. Double check and confirm that you are NOT installing on false ceiling. No Buts. See photo from @analyy.chapaa for an attempted installation on a false ceiling.

2. Measure out and mark the spot where you want your pole to be, on the floor. Make sure you have cleared out any furniture, light fixtures etc... in the entire radius.
3. Make sure your pole care kit is on hand. It should minimally include a leveller tool, ethanol and a rag.

4. DO NOT USE WD40 ON ANY PART OF YOUR POLE. Doing so will attract dust and dirt, causing gunk to build up. It may also cause premature wearing of the internal mechanism.
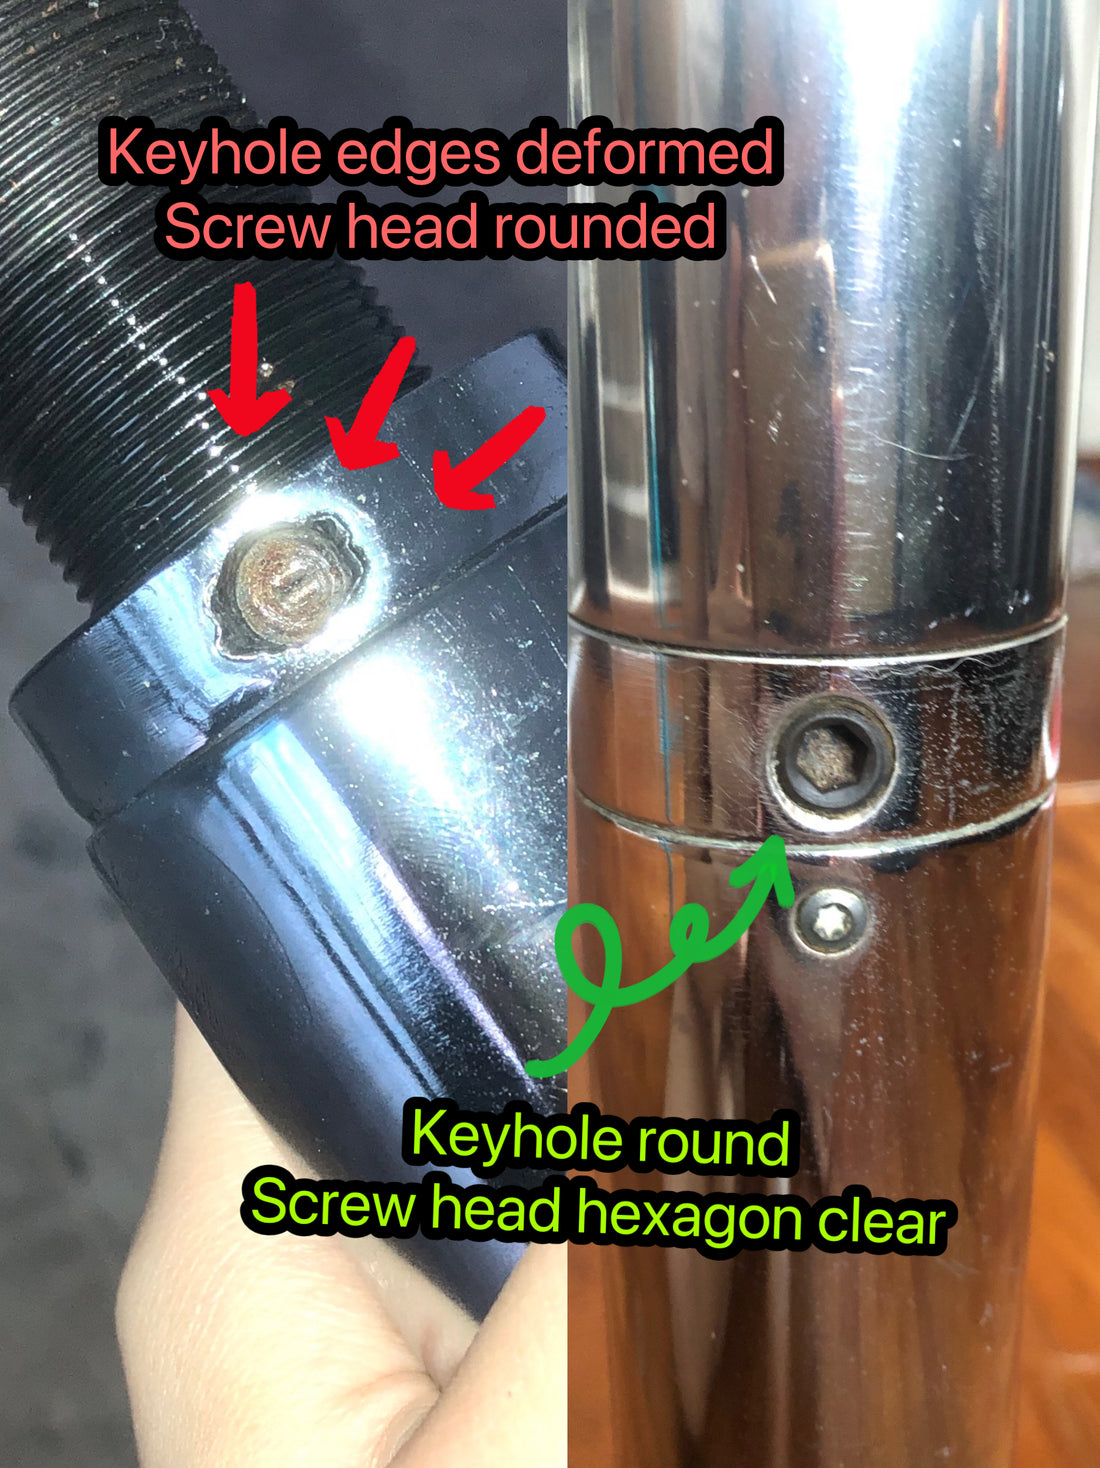
5. When turning the screws and/or twisting the pole to the ceiling, DO NOT use your "eat milk" strength to tighten, or else...
For screws:
- You may damage the thread
 Photo from newmetalworker.com
- You may round/strip the screw head

- You may cause the screw to seize aka get stuck
For Pole:
- Overtightened poles may have uneven and/or poor spin
- Overtightened poles may suffer damage to internal mechanism
- Overtightened poles may bend in the middle, potentially causing the pole to break or deform over time
All the above will make future uninstallation unnecessarily expensive/impossible.
6. To ensure that the pole and screws are properly secured, ONLY use your hand to turn the Allen keys. DO NOT use an electric screwdriver. Once you feel some resistance, continue turning slowly until you are unable to turn further using the strength of one hand. DO NOT USE YOUR BODY WEIGHT TO TIGHTEN THE SCREWS FURTHER.
7. After installation, be sure to test your pole by violently shaking it back and forth. You want to make sure that the top and bottom done do not shift from position. If you see them wriggle back and forth, that is OK.
8. Test the pole in the static mode with some inverts and basic spins. If the pole does not shift, repeat with pole in spinny mode. Portable poles are generally less spinny than studio poles/ permanent mount poles. If your pole is able to spin 2 rounds smoothly with you on the pole, it is doing fine.
9. On certain types of flooring, you may see that the bottom plate of the pole slip. You can add additional grip by placing a rubber mat underneath the bottom plate, cut to size if preferred.
Good luck!
We've included links below for your convenience.
Tension Pole Installation Service